Blogueando mis notas con Pelican
En este POST explico como he decidido usar pelican un generador de contenido estático hecho con python para crear un blog sencillo donde documentar y recordar las complicaciones en el día a día de mi trabajo.
Además así tendré la oportunidad de practicar un poco mi forma de escribir en inglés y además la forma de expresarme, tendré que invertir algo de tiempo en este blog pero creo que a la larga será beneficioso para mi.
Lo que quería y lo que he conseguido
Quería tener algo rápido para empezar a crear notas personales, he estado usando
vim wiki para mis tareas diarias, y está muy bien pero tiene algunos problemas que
me gustaría solucionar. Con vim wiki todos los ficheros se guardan en el mismo
directorio, necesito poder guardar las notas en la nube para poder acceder a ellas
desde casa y la oficina.
Una utilizada útil de vim wiki es poder generar ficheros PDF de las notas así que
creo que mantendré también esta aplicación.
He elegido pelican, pero no era tan sencillo como esperaba, he tenido que refrescar
mis conocimientos con make, mirar diferentes tutoriales,
documentación,
buenas prácticas para crear posts, páginas, archivos, assets, complementos, temas etc.
Me arrepiento de elegir pelican para el Blog? No creo, pero este es mi primer post. Espero escribir un nuevo post después -puede que un año- un tiempo para dar una opinión con algún conocimiento.
Hay otros generadores de contenido como:
-
Jekill (2008, v4 at time of writing) desarrollado con ruby.
-
Hugo desarrollado con Go.
Y otras alternativas con Python también:
Por ahora intentaré usar pelican, me gustaría saber gestionar las plantillas y colocar imágenes (conseguido :) ), aplicar estilos, archivar artículos, añadir comentarios y un montón de cosas
Setting up the work environment
Installing and setting the work environment is quite simple the steps I follow: * Having virtualenv and virtualenvwrapper installed... * Create a python virtual environment to get all pelican dependencies isolated
mkvirtualenv pelican --python=which python3
* Install pelican
pip install pelican
That's all you need to have an initial environment to create your own blog Just that? and I could even save a step if I don't mind having pelican in my host python environment!
Now to create the initial blog
-
Create the initial blog
mkdir path_to_my_blog
cd path_to_my_blog
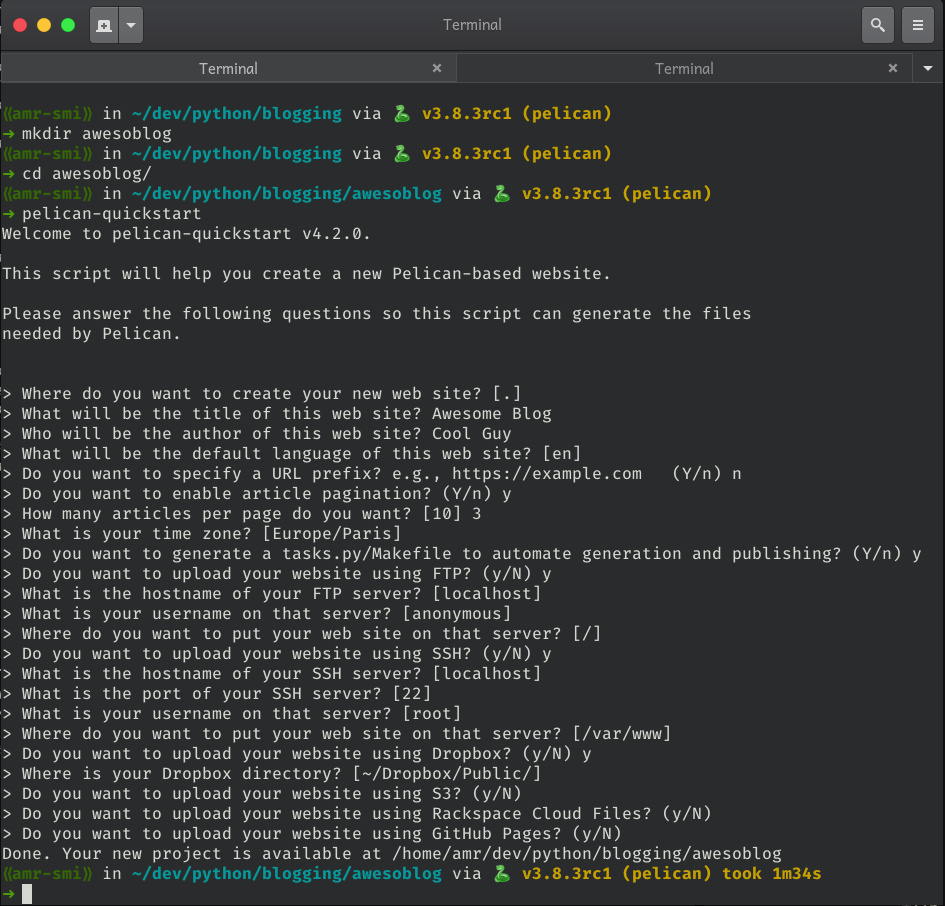
pelican-quickstart
-
Now you have to follow the steps in the wizard
-
In the brand new folder tree inside of content folder create a markdown file
-
Free your mind and your ideas in that post
-
pelican content -
pelican --listen -
Open your browser in the path http://localhost:8000
BooM!!! you have your blog up and running
Publishing
You can have your blog published in a huge variety of options, github, dropbox, s3, ftp or ssh to your server.
I choose to push it to a little droplet I have in DigitalOcean, giving the ssh details to rsync my output blog to that path and having an nginx server to serve my blog (too much for a little blog?)
Next tasks in my TODO list
I eyed a nice clean theme for my blog attila and now I'll try to make it look pretty having that theme as base.
I need to explore how to adjust templates to have a post structure nice and appealing to read.
I like using vim for whatever I can, this is a good excuse to use it, there are some things I can do to develop posts and see the output interactively and I can speed things up a bit with it, for example I'd like to create snippets to create new posts with more or less a good structure.
OOooOOh I'm all excited to get this thing on going!!!
Now I hope this is not my last post after the 'new thing excitement' rush