Blogging my notes with Pelican
In this post I explain how I decided to go with pelican python static generator to create an simple blog where I can document and remember the difficulties I experience in my day by day job.
It also brings me the opportunity to practice a bit my writing style in English and also how to express myself, I'll have to invest some time in it but I think in the long run it will benefit me in many ways.
What I wanted and what I end up with
I wanted to have something quick to start creating notes to myself, I've been using vim wiki to keep track of my daily tasks, and it is great but it presents some issues I would like to get rid off. With vim wiki all files get saved in the same folder they cannot be arranged in a folder tree to categorize them, I need to store file notes in the cloud in order to be able to access from different home and the office. It is possible though to generate a PDF file out of the wiki documentation and that is advantage that I would like to keep using, so my plan is to keep using it together with the blog.
I choose pelican, but it wasn't as straight forward as I expected, I had to refresh
my ideas on make, I had to look into different howtos,
read the docs,
what were the best practices to put posts, pages, archives, assets, using plugins, theming etc.
Do I regret choosing pelican for blogging? I don't think so, but this is my first post. I'll hope to write a new post after -maybe a year- a while to give my impressions with some knowledge points gathered.
There are other static content generators, like
-
Jekill (2008, v4 at time of writing) built with ruby,
-
Hugo built with Go
And there are python alternatives too:
For now I'll learn and try out pelican, I'd like to see how to handle different templates and set images, different styles, archiving articles, comments and a lot more stuff.
Setting up the work environment
Installing and setting the work environment is quite simple the steps I follow: * Having virtualenv and virtualenvwrapper installed... * Create a python virtual environment to get all pelican dependencies isolated
mkvirtualenv pelican --python=which python3
* Install pelican
pip install pelican
That's all you need to have an initial environment to create your own blog Just that? and I could even save a step if I don't mind having pelican in my host python environment!
Now to create the initial blog
-
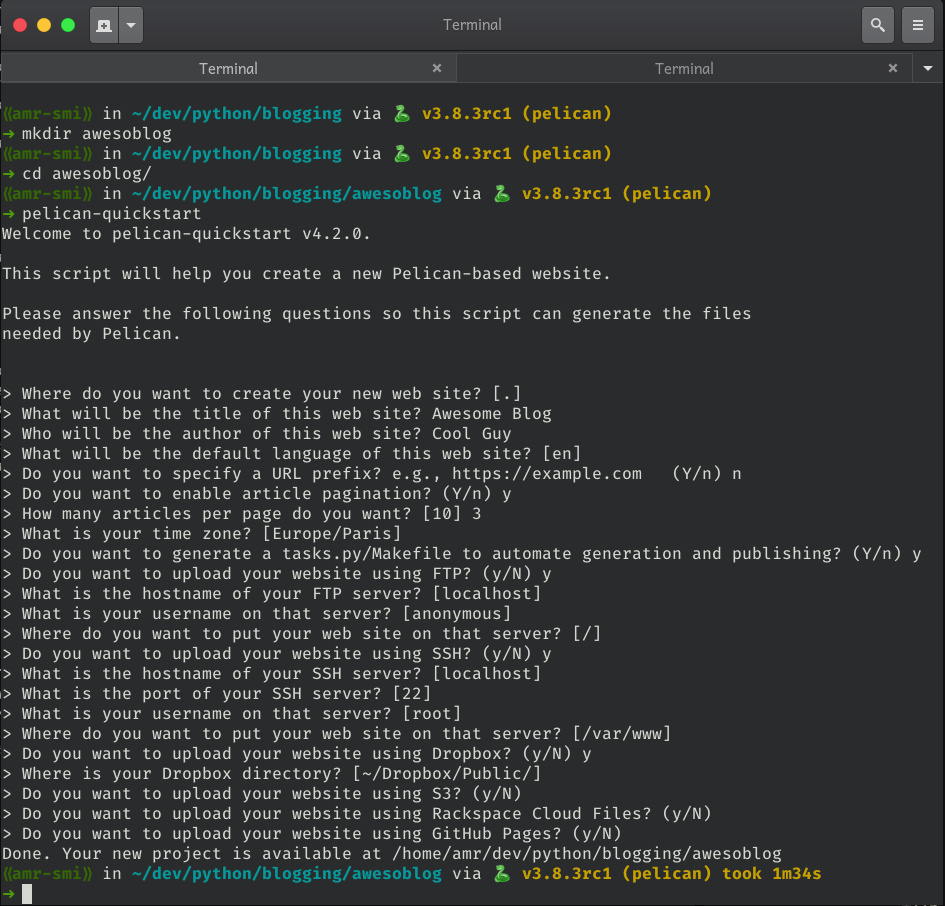
Create the initial blog
mkdir path_to_my_blog
cd path_to_my_blog
pelican-quickstart
-
Now you have to follow the steps in the wizard
-
In the brand new folder tree inside of content folder create a markdown file
-
Free your mind and your ideas in that post
-
pelican content -
pelican --listen -
Open your browser in the path http://localhost:8000
BooM!!! you have your blog up and running
Publishing
You can have your blog published in a huge variety of options, github, dropbox, s3, ftp or ssh to your server.
I choose to push it to a little droplet I have in DigitalOcean, giving the ssh details to rsync my output blog to that path and having an nginx server to serve my blog (too much for a little blog?)
Next tasks in my TODO list
I eyed a nice clean theme for my blog attila and now I'll try to make it look pretty having that theme as base.
I need to explore how to adjust templates to have a post structure nice and appealing to read.
I like using vim for whatever I can, this is a good excuse to use it, there are some things I can do to develop posts and see the output interactively and I can speed things up a bit with it, for example I'd like to create snippets to create new posts with more or less a good structure.
OOooOOh I'm all excited to get this thing on going!!!
Now I hope this is not my last post after the 'new thing excitement' rush